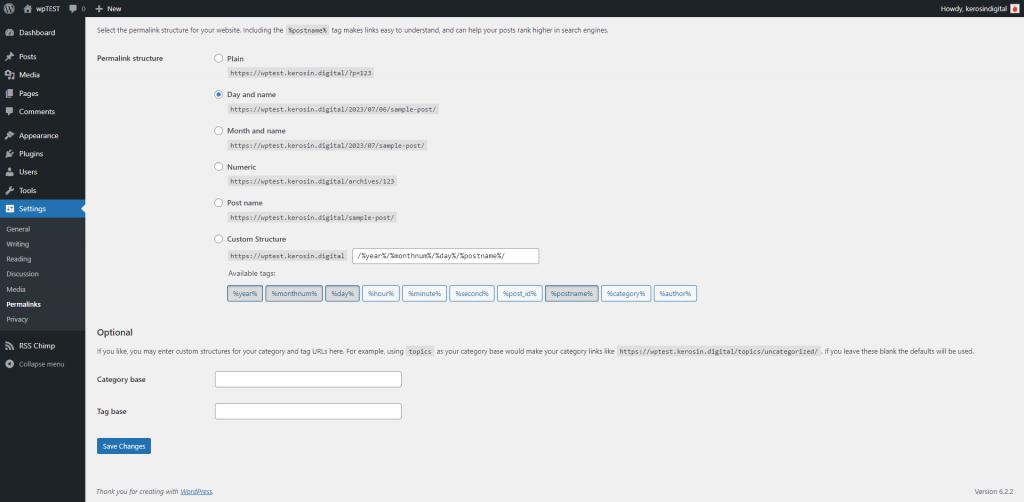
If after activating the plugin changes are not active or custom feeds are not displayed, this is mostly because RSS chimp does not flush the permalinks when activating and saving. Clearing the permalinks can have a short-term performance impact on the site, which is why RSS Chimp does not automatically flush the permalinks.
Normally, RSS Chimp automatically displays changes when a new post is published. If you want the changes to appear before a new post is published, you will have to flush the permalinks manually.
How to flush the permalinks in the WordPress backend?
Step 1: In the WordPress admin dashboard, locate the “Settings” menu on the left-hand side. Hover your mouse over “Settings,” and a sub-menu will appear. Click on “Permalinks” from the sub-menu.
Step 2: You don’t have to make any changes on this page, just scroll down to the bottom of the page. Click on the “Save Changes” button to save your new permalink structure. After this, all the changes as well as the custom feeds should be active and shown.

How to flush the permalinks with WP CLI command?
Step 1: Opening a command-line interface (CLI) or terminal.
Step 2: Use the ‘cd’ command to navigate to the root directory of your WordPress installation. For instance:
cd /path/to/your/wordpress/installationMake sure to replace “/path/to/your/wordpress/installation” with the actual path to your WordPress installation directory.
Step 3: Execute the following WP-CLI command to flush the permalinks:
wp rewrite flushStep 4: Press Enter to run the command. The ‘wp rewrite flush’ command will regenerate the rewrite rules for your WordPress site, which includes refreshing the permalinks. Once the command finishes running, you should see a success information. After that, all changes as well as the custom feeds should be active and shown.